Saturday, November 23, 2013

Crazy Busy Day!

So I've been dragging my feet on posting anything lately because I've been really frustrated about my Halloween costumes! I didn't get the pictures I wanted because my camera was broken and I worked so hard on those costumes. Now I have a camera again but now its a matter of getting them redressed in the costumes and getting some awesome pictures... It will come, eventually.

But in the meantime, yesterday was a very productive day! I really should plan not to load too much into one day but I pulled it off, so that's exciting!

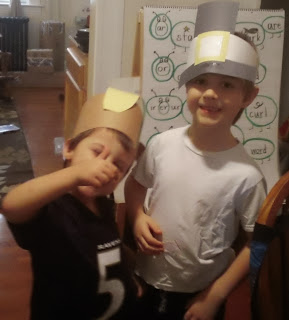
We did our school work as per usual and I decided today would be a good day to do a "Thanksgiving Day craft". So we watched the Charlie Brown Mayflower special and made Pilgrim hats and Indian Headdresses...  I probably should have made the feathers on the headdress a little smaller because they flopped around but the boys love playing with glue so they didn't mind!

So next on my list, I had an "order" for some cupcakes. My friend's daughter's birthday party was last night. She loves chocolate, owls and the color blue. So using this chocolate cupcake recipe (because it is an amazing recipe!), a vanilla buttercream recipe, my trusty pink KitchenAid Mixer,
and a great idea from Pinterest for Owl Cupcakes using Oreos and M&Ms, I made these!
Next time I make these I will find a better way to remove the top of the Oreo from the cream. I felt they were a little sloppy... but then again I am a little bit of a perfectionist!

After those were made and decorated, I had little boys begging for cupcakes. But it was almost dinner time so I had to make that first. Again if I had planned my day better, dinner last night wouldn't have been so time consuming. But I've been wanting this particular dish for quite a while so I had to make it.

We had a Chicken Rice and Bacon Casserole for dinner. (This recipe via The Nest calls for mushrooms.... I sometimes do the mushrooms, or sometimes I leave them out depending on whether I have some on hand. Either way it tastes amazing!)

I got the boys showered, I read them a story, put them to bed, cleaned the kitchen for the 4th time today and then crashed on the couch!

After I walk away from the computer today, I will need to go finish the laundry and then its off to the movies with the girls (NO KIDS!! WOO HOO!)  because while I have issues with the casting of Hunger Games because I loved the books and I feel like they missed the mark with Peeta, I am definitely needing to go see some Catching Fire today!

Friday, October 18, 2013

October Birthday

My baby, Andrew, has an October birthday and for the past 2 years his birthday request has been to decorate the house for Halloween and make cupcakes to go with the theme.

Last year we made a cupcake cake in the shape of a ghost, using the idea from Family Fun Magazine.
 
And we made cute bats from the same magazine out of toliet paper rolls, poster board, and paint.
We this year, of course Andrew wanted to decorate again... and fortunately for us the bats survived the move so we were able to hang them again. But I needed to do something new this year. So we decorated his bedroom door. I found some giant googly eyes at Target in the $1 section, used painters tape, construction paper, and streamers and made a face!
His cupcakes this year were kind of a strange mix.  I really wanted to make this apple cinnamon cupcakes recipe I found. And my plan was to make vanilla frosting and color it to make it look like candy corns on top. Well because I bake in the middle of the night, when I run out of vanilla extract I'm pretty much out of luck (I needed these done by the morning). So I improvised, went to google and found a Candy Corn Frosting recipe. (It was so loud to make as I ran a cup of candy corns through my blender! I know my neighbors hated me.)  The cupcake was amazing, the frosting was amazing... I maybe won't combine them again though. Too many different flavors in one cupcake!
By the way.... Great pinterest find.... if you wrap your icing in plastic wrap after making it, you can store it easily or have an easier time putting it into the bag (because I for one always make a mess when I load the bag full of icing!)
I would have made pumpkin spice cupcakes, but I made those the week before for my friend's daughter's birthday party! So we needed a change.... plus it worked out because I'm not sure candy corn frosting and pumpkin spice cupcakes would work out so great. (Pictured below is a Pumpkin Spice Cupcakes with Vanilla cream cheese frosting topped with a candy acorn)
 
Needless to say.. He had a VERY happy birthday!

Saturday, September 28, 2013

Jumping Back In

Between settling into a new area unlike anywhere I've ever lived and moving into my second year of homeschooling, I had to take a blogging break while I got myself together. I felt very overwhelmed by everything that was going on and really wanted to focus my attentions on getting my family moved and settled. And now that we are I have begun making new things, trying new recipes, and enjoying creating again. You don't realize how much you miss something until you start doing it again!

So just a quick rundown of what we've been up to...

We moved to Baltimore this past January

Got to play in the snow
Got to see the Cherry Blossoms bloom

We get to ride on the light rail into downtown to play
Started First Grade

Next post will be some of the things I've been working on recently... I've had a lot of fun with some recent projects and am excited to share!

Friday, July 13, 2012

Boiled Peanuts

Its summer time, and there's nothing better than boiled peanuts!

Typically, I've always made boiled peanuts by well, boiling them in a pot. But that takes a while and I have a gas stove, so the idea of leaving an open flame for an extended period of time makes me a little nervous. So I pulled out the crock pot!!

Using:
2lbs of green peanuts
1 cup of salt
12 quarts of water

I put all ingredients in the crock pot, cover and cook on high for 18 hours. 
Drain and serve! 
 mmmmmm....

Refrigerate in ziplock bags for up to 2 weeks, or freeze for up to 2 months. Reheat in microwave before serving.

Wednesday, June 27, 2012

Drawstring Laundry Bag

So my sister and her boyfriend just graduated high school, so for her graduation present she asked for a drawstring laundry bag. So I went hunting for cute ideas an found this great tutorial and made these adorable bags!!
 This tutorial made for a shorter bag than I was looking for. It called for about 2/3 yard of each fabric. I added the last 1/3 (because I bought a yard of each) onto the end of the bag to make it longer.
I did NOT do the monogramming... while I wish I could get the equipment to do it, I want a serger first! (If you looking for a great monogrammer in Charleston, contact me! She's amazing!)


Helpful tip:

Since the front and the back of the top seam were different colors, 
I put the pink thread in the bobbin and the blue thread on top of the machine. 
This way my thread matched the color of the fabric!
 Also, I finally got a label made! I hated not being able to put my name in my creations, so I found a label on namemaker.com that I liked and here is what I got...

Sunday, June 24, 2012

Pillowcase Dress with Ruffles

I love my pillowcase dresses! Its so much fun making them but I needed a challenge recently so I decided to try my hand at ruffling. Plus I had it in my head that this dress would be perfect with a ruffle.  I found a pattern for a ruffled bottom pillowcase dress and a to help get me started. I used my previous pattern for the dress, but I added an inner lining to cover the ruffle seam. Well I don't have a gathering foot or a ruffling foot ( I will one day but the sewing shop was out and I wanted to do it then and not wait to order one) so I decided to try ruffling by hand.  I went to google and looked up ruffling and a ruffling tutorial and some youtube videos and watched them until I felt like I understood. It took waaaay longer than it would have it I had the right foot, but it was fun to learn how to do it without one.

I started by cutting 5 strips each 3" wide x 22" long.
 I set my machine at the longest stitch and went across twice, leaving some thread at the ends. Hold the thread at the end and slowly ruffle the fabric between stitches until all done. My ends frayed so I ran a zig zag stitch over the end
 Then I attached all the pieces together and made one long ruffle.
I put the ruffle between the inner and outer lining of the pre-cut fabric (right sides facing) and sewed them all together and flipped so I could start putting the dress together.

 I also attempted fabric ties this time instead of ribbon, to match the ruffle.... Oh I loved it!
 Here was my final product.... Perfect little July 4th dresses!

Also, I've found this amazing sewing shop called Five Eighth Seams. They do sewing classes, they sell beautiful fabric, and the staff is just wonderful. Well I'm in love with their fabric! And they are so helpful that you just can't resist going to the store, not just for fabric but for great tips.

Well I was hunting for a pattern for another pillowcase dress I was making and I found some beautiful fabric that I just had to use. While I was in there they gave me a great idea!  Instead of just a 2 toned dress, which was what I was planning on, do a 3 toned dress!

All I did was add a small strip of fabric between the 2 sections and sealed.  The strip was 6" cut and folded in half and placed between the bottom and top piece, I used a 1/2" seam allowance. I could have use a 1/4" but it was my first time doing it.
And it was just too beautiful to not make a headband to go with it!

Friday, April 6, 2012

I made a tutu!

It was my best friend's little girl's birthday a little while ago and I am late getting her present made...but i finally finished it!! I wanted to make a her tutu, so I found a couple tutorials for making them on Pinterest. It was actually incredibly easy! Which is awesome because I have so many little girls in my life to make presents for!

For the basic design, I used the tutorial on A Small Snippet's blog.
I did a few things different:
1. I wanted it longer so I made my cardboard 7"x 18"
2. My fabric store didn't sell the rolls of tulle (which I want to try next time), instead I bought 3 yards of each color (6 yards altogether). Then folded, wrapped, and cut to make the strips needed.
Tip: This pictures looks loose, but it actually needs to have no spaces or gaps between tulle. You don't want to see the elastic.

Then I added some flair using a skinny ribbon between every 2 slip knots from Twigs and Toadstool's blog.
Finally, I wrapped a satin ribbon around the top using the tutorial on Treasures for Tots
And I used Chatelaine's tutorial for tying the perfect bow! It was for tying on a box but I improvised.


This is my finished product! I am so excited!! :)
Front
Back